
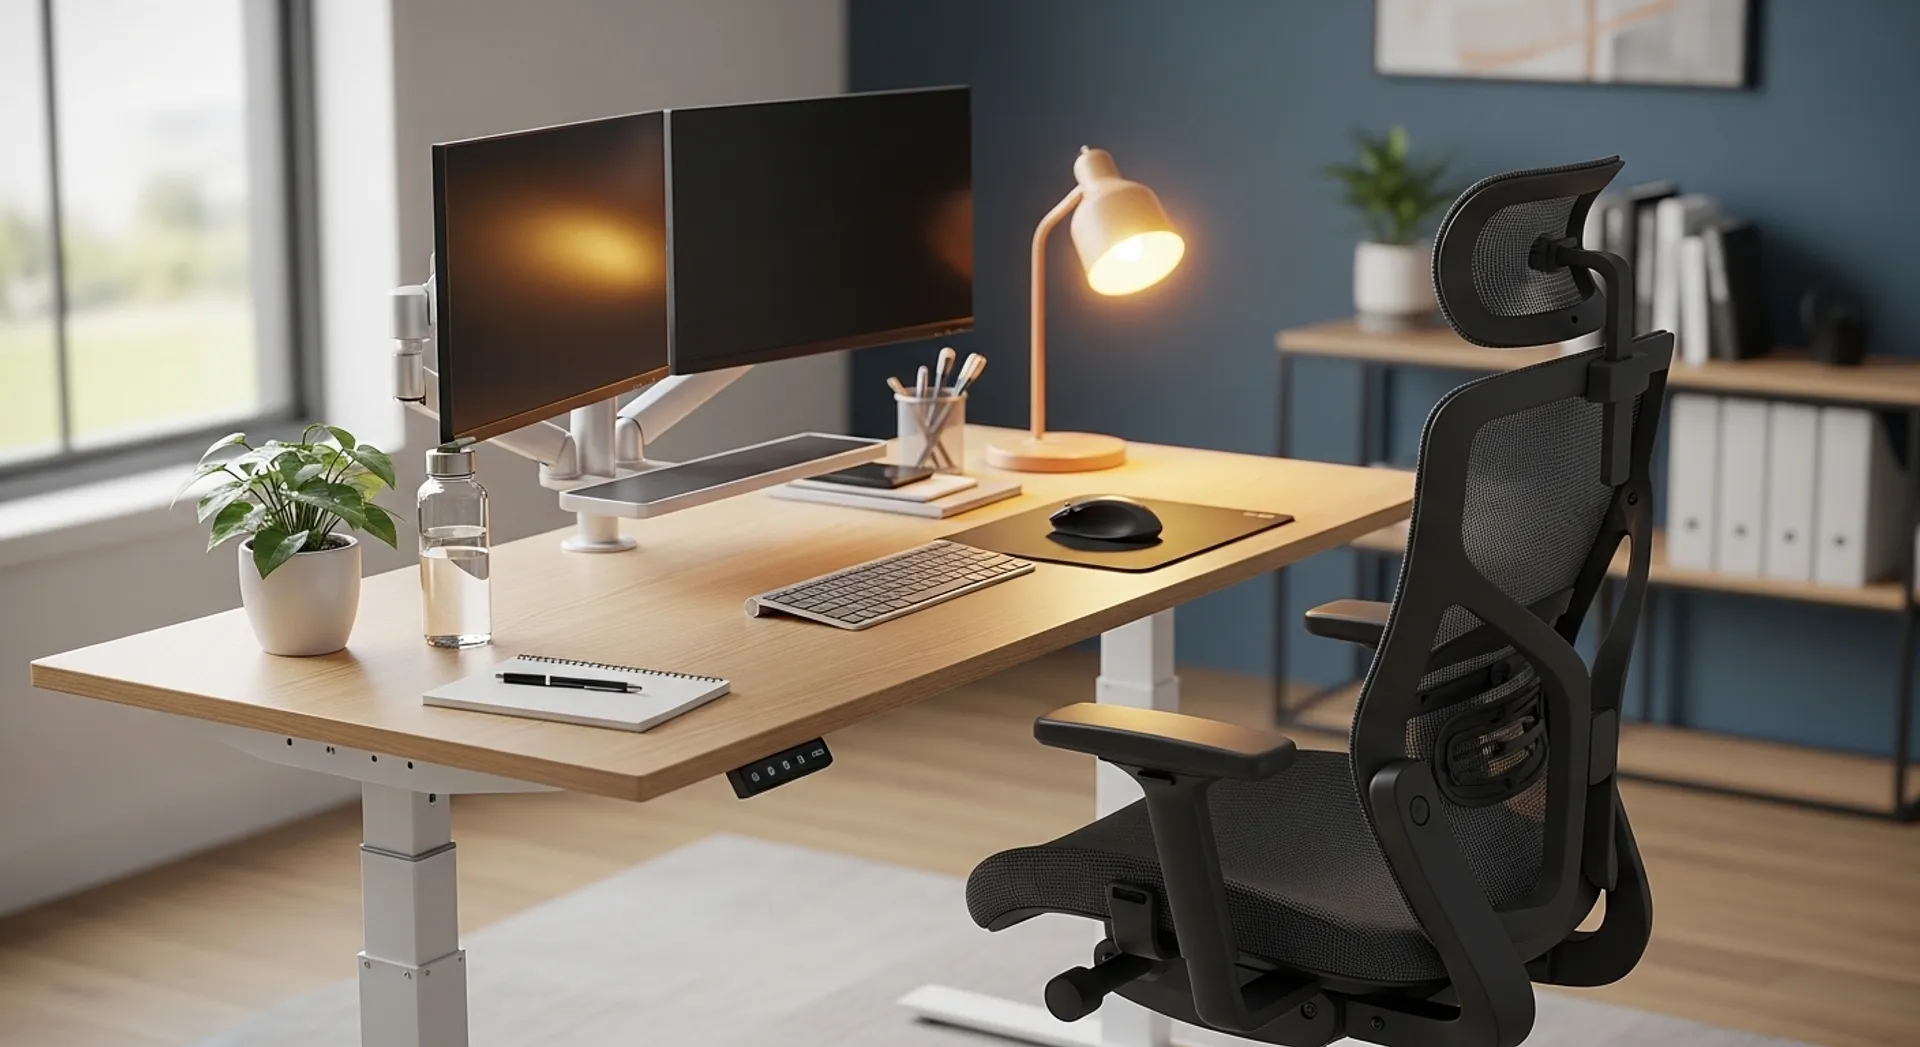
If you sit for hours a day, your chair and desk setup can either support your body—or quietly wear it down. Many people buy an “ergonomic” chair and expect instant relief, but comfort usually comes from correct adjustment, not the price tag. The goal is simple: keep your joints in neutral positions, reduce pressure points, and make good posture the easiest posture to hold.
This guide walks you through an ergonomic office chair setup step by step. You’ll learn exactly what to adjust, why it matters, and the common mistakes that cause back, neck, and shoulder pain. It’s written for real-life home offices and workspaces, not perfect lab conditions.
Start With the Foundation: Seat Height and Foot Support
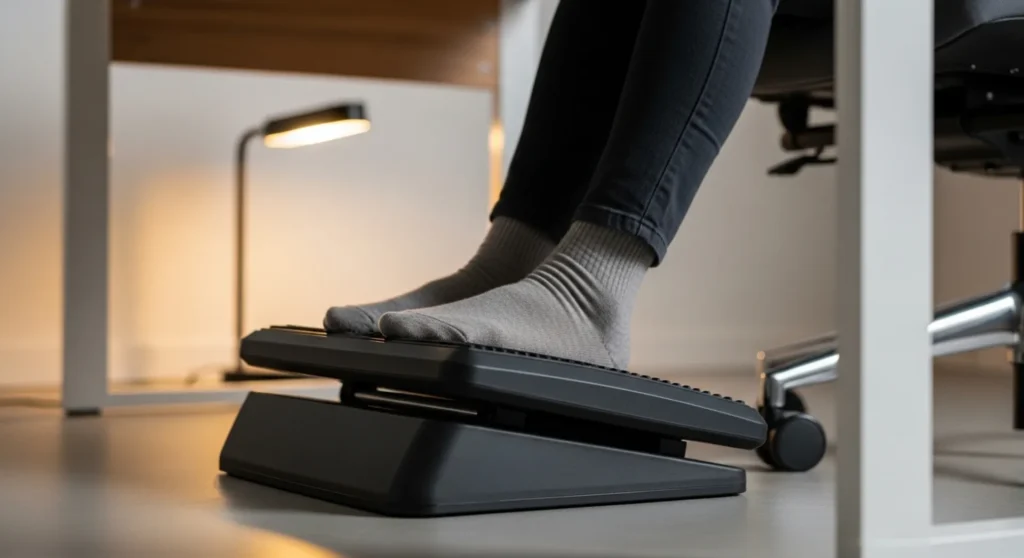
Before touching armrests or lumbar knobs, set your seat height. This one adjustment affects everything else—knee angle, hip position, back support, and even where your elbows land.
Seat height goal: Your feet rest flat on the floor (or a footrest) and your knees are roughly level with your hips, or slightly lower. If your chair is too high, you’ll slide forward and lose back support. Too low and your hips tuck under, stressing the lower back.
- Adjust the seat so your thighs are supported but not pressed tightly by the front edge.
- If your feet don’t reach the floor, raise the chair to match desk height and use a footrest.
- A stable foot position helps your pelvis stay neutral—key for comfort.
Dial In Seat Depth and Backrest Contact
Seat depth determines how much of your thighs are supported and whether you can sit back fully into the backrest. Too deep and the seat edge presses behind your knees, cutting circulation and encouraging slouching. Too shallow and you lose thigh support, shifting pressure to your hips and lower back.
Seat depth goal: Sit all the way back so your lower back touches the backrest, with about two to three finger widths between the seat edge and the back of your knees.
- If your chair has a seat slider, move the seat pan forward or back to create that gap.
- If it doesn’t, add a small lumbar cushion and prioritize sitting back rather than perching.
- Avoid sitting on the edge of the chair—this forces your spine to do all the work.
Set Lumbar Support for Your Natural Curve
Lumbar support should fill the small curve of your lower back—not push you forward or feel like a hard lump. When lumbar is too aggressive, people often scoot forward to escape it. When it’s too low or missing, the pelvis tilts back and the spine rounds, increasing disc pressure and fatigue.
Lumbar goal: Support the curve right above your belt line, where your back naturally arches.
- Raise or lower the lumbar pad so it matches your curve.
- Adjust firmness so it feels supportive, not intrusive.
- If your chair has no lumbar, a small cushion or rolled towel can work.
Backrest Recline: Use It, Don’t Fear It
Many people lock their chair upright at 90 degrees, thinking it’s “correct.” In reality, a slight recline often reduces spinal load and makes it easier to keep your head stacked over your shoulders. The key is controlled recline with support, not collapsing backward.
Recline goal: A gentle recline around 100–110 degrees for typing and reading, with your back still supported.
- Open your hip angle slightly with recline to reduce lower-back compression.
- Use tension controls so you can lean back without fighting the chair.
- For focused work, alternate upright and slight recline to avoid stiffness.
Armrests: Support Your Arms Without Shrugging
Armrests can be a major pain trigger when they’re too high, too wide, or set forward incorrectly. High armrests force your shoulders to shrug, causing neck tension. Wide armrests flare your elbows out, straining shoulders and wrists. The right setup lets your arms rest lightly so your shoulders stay relaxed.
Armrest goal: Elbows close to your body, forearms supported, shoulders relaxed.
- Raise armrests until your forearms can rest without lifting your shoulders.
- Set width so your elbows sit under your shoulders, not out to the sides.
- Adjust forward/back so your elbows are supported while typing, not pushed away.
Desk and Keyboard Position: Keep Elbows at 90–100 Degrees
Your chair setup only works if the desk height matches it. If your desk is too high, you’ll raise shoulders and compress the neck. Too low and you’ll hunch forward, collapsing the chest and rounding the upper back.
Keyboard goal: Elbows at about 90–100 degrees, wrists neutral, shoulders down.
- Bring the keyboard close so you don’t reach forward.
- Keep wrists straight—avoid bending up or down while typing.
- If the desk is fixed and too high, raise the chair and use a footrest.
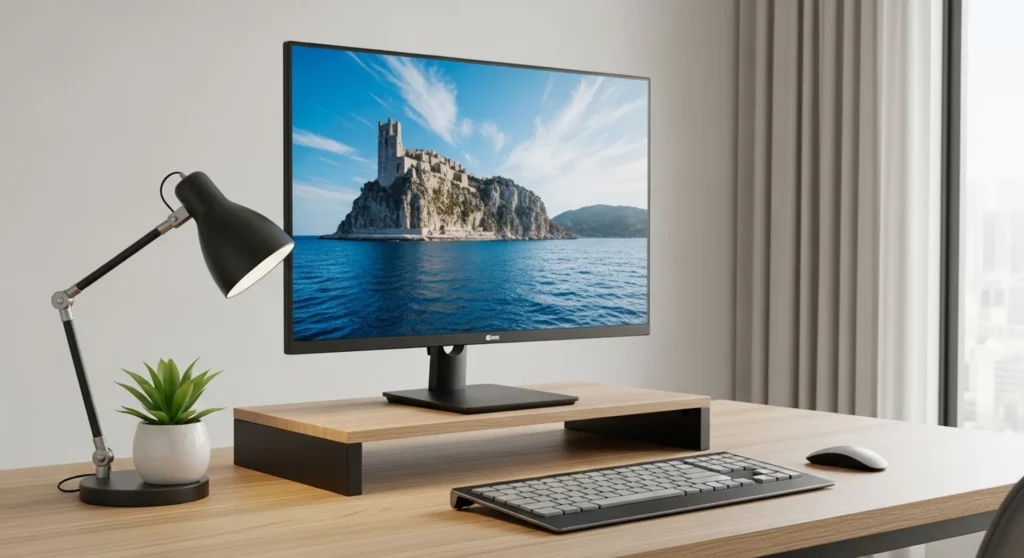
Monitor Height and Distance: Fix Neck Pain at the Source
Monitor position is a top cause of neck strain. If the screen is low, you drop your head forward. If it’s too far, you lean in. Even a small forward head posture increases load on the neck and upper back over time.
Monitor goal: The top third of the screen at or slightly below eye level, at about an arm’s length away.
- Raise monitors with a stand or sturdy books if needed.
- Center the primary monitor directly in front of you.
- If you use a laptop, consider an external keyboard and mouse plus a laptop stand.
Common Setup Mistakes (And Quick Fixes)
Most discomfort comes from a few predictable issues. Fixing these can bring fast relief, even without buying new furniture.
- Perching on the seat edge: Slide back until your back touches support.
- Feet dangling: Use a footrest or lower the seat if possible.
- Armrests too high: Lower them until shoulders relax.
- Monitor too low: Raise it to reduce neck flexion.
- Keyboard too far: Pull it closer to stop reaching.
Make It Sustainable: Microbreaks and Movement
Even the best chair cannot replace movement. Your body is built to change positions. Short breaks help circulation, reduce stiffness, and reset posture. Think in minutes, not hours.
- Stand up for 30–60 seconds every 30–45 minutes.
- Do a few shoulder rolls or chest-opening stretches.
- Change posture: recline slightly, then return to upright.
For general workstation guidance and safety basics, you can review OSHA’s ergonomics resources: https://www.osha.gov/ergonomics.
Suggested Internal Links (CompulsivePaintball office furniture blog)
Final Thoughts
An ergonomic setup doesn’t require perfection or expensive gear. It requires alignment: feet supported, hips stable, back supported, shoulders relaxed, and screens positioned to keep your head upright. Start with seat height and seat depth, then build upward—lumbar, recline, armrests, keyboard, and monitor. Small adjustments add up, and comfort is usually the result of a few smart fixes done consistently.